Sewing instructions for the Tiffany bomber jacket
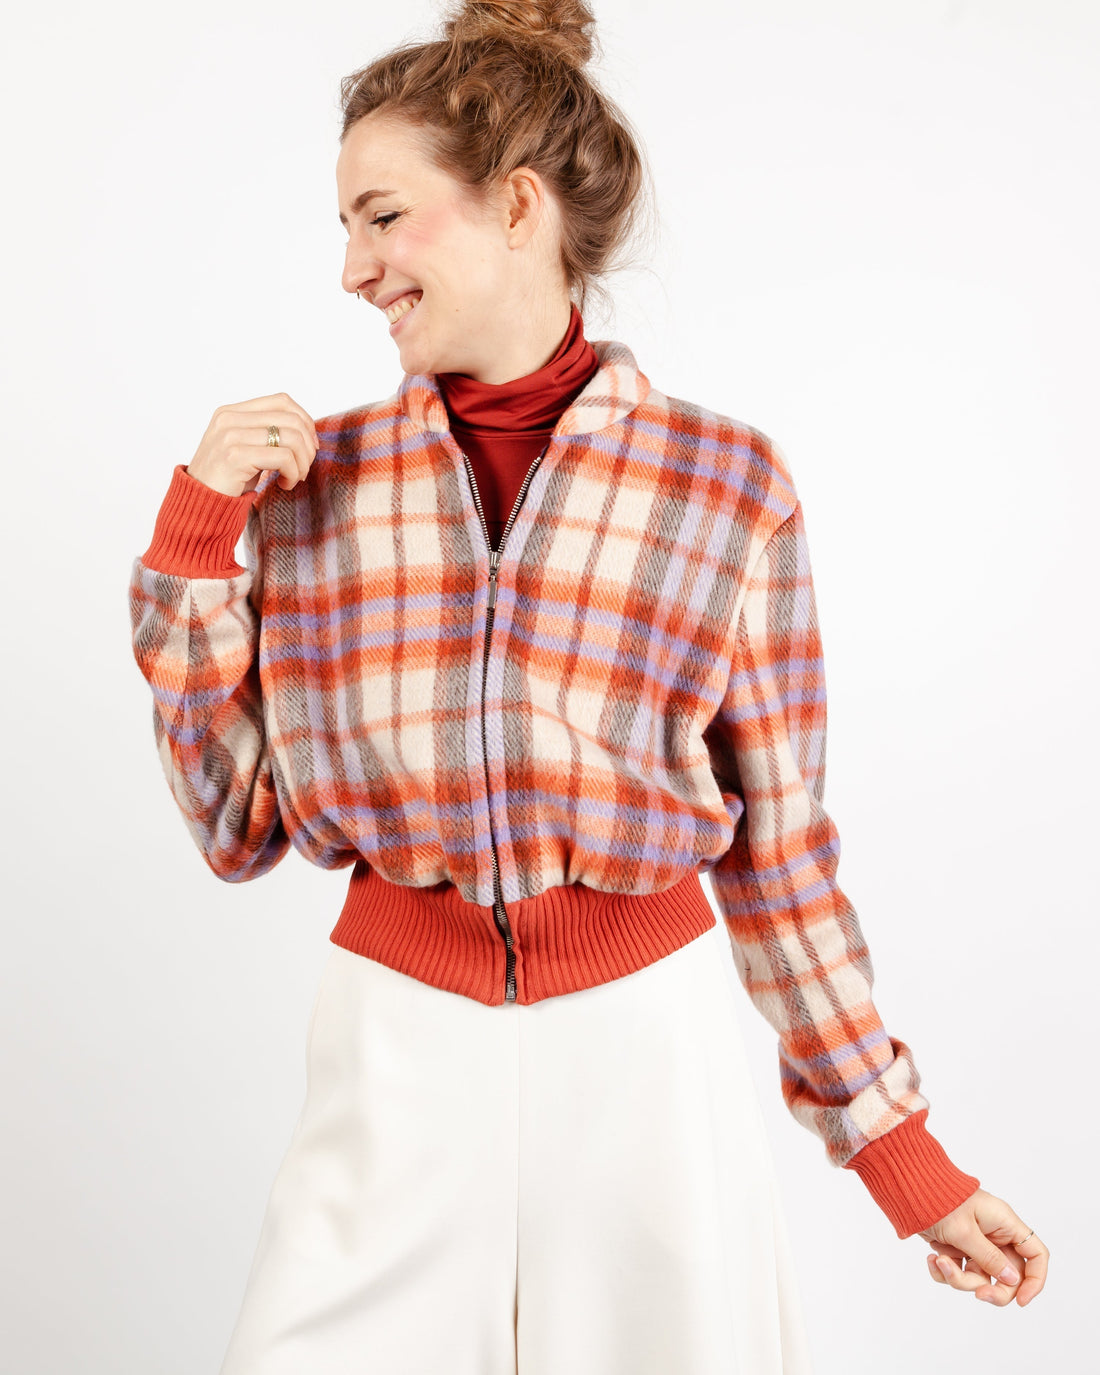
The Tiffany bomber jacket has a cropped, slightly oversized cut. The ribbed cuffs at the hem ensure a close fit. The center front zipper and the pointed stand-up collar are clearly reminiscent of a classic blouson . The seam pockets in the side dividing seams don't disrupt the pattern or the clean look of the short jacket .
Length at back center = 46-55 cm
Tiffany was sewn from a checked wool fabric in this tutorial.
Materials needed:
We recommend a thicker wool fabric and an elastic ribbing fabric .
| Sizes 34-42 | outer fabric | 1.40 m | 140 cm wide |
| Sizes 44-50 | outer fabric | 1.60 m | 140 cm wide |
| Sizes 34-42 | Lining | 1.10 m | 140 cm wide |
| Sizes 44-50 | Lining | 1.20 m | 140 cm wide |
| Sizes 34-42 | Ribbed fabric | 0.40 m | 80 cm wide at the break |
| Sizes 44-50 | Ribbed fabric | 0.50 m | 80 cm wide at the break |
| Sizes 34-50 | insert | 0.65 m | 90 cm wide |
| Sizes 34-50 | Wadding | 0.20 m | 140 cm wide |
| Sizes 34-50 | Zipper tlb. | 1 piece | 46-55 cm long |
Cut:
Seam allowances are included - 1cm wide or as indicated by the marking notches!
Cut out the pattern pieces from your outer fabric, lining fabric, and interfacing. Place the fabric right side up. Align the selvedges parallel to the center so you can lay the back piece, facing, and waistband on the fold. All pattern pieces should be laid with the printed side facing up. Always align the grainline arrow in the same direction on all pieces and parallel to the selvedge of the fabric. Transfer all notches from the pattern by making a 3mm snip with scissors or using chalk. Snip the seam allowance on the fold, as this is always the center point. Markings define the positions of dart ends, pocket positions, etc. Transfer these either with chalk or pins. It's best to roughly cut out all outer fabric pieces that will be fully interfaced first. After you've fused the interfacing, cut them out precisely. There's also a video here about gluing and fused pattern pieces and a video for cutting out plaid.


You will need the following fabric:
- 1x back piece in half
- 2x side panel, mirrored
- 2x front part, mirror image
- 2x upper sleeves, mirrored
- 2x opposite underarm sleeves
- 1x collar


also with shaping tape:
- 1x neck hole back piece
- 2x armhole back piece
- 2x armhole side panel
- 2x neckline front
- 2x armhole front

also with insert:
- 1x receipt - rear in the break
- 2x front document opposite

You will need cotton wool:
- 1x collar

You will need the following knitted fabric:
- 1x bundle in the break
- 2x sleeve cuffs


You will need the following lining fabric:
- 1x back piece in half
- 2x side panel, mirrored
- 2x front part, mirror image
- 2x upper sleeves, mirrored
- 2x underarm sleeves, mirror image
- 2x pocket bag side panel, mirrored
- 2x pocket bag front part opposite
Sewing instructions:
Seam allowances are included - 1cm wide or as indicated by the marking notches!
You will need a sewing machine to sew this bomber jacket.
The colored lines in the pictures show you, in addition to the description, where to sew a seam or glue something.
When sewing, pay attention to the seam allowance included in the pattern. Seam allowances not specifically marked are 1 cm wide!
Have fun sewing!
Sizes 42-50 have a bust dart; please sew this according to the pattern.

Start with the in-seam pockets on the front piece. These pockets, as the name suggests, are integrated into a seam. Sew one pocket bag front piece to the corresponding front piece, right sides together. Be sure to only stitch the opening, as you will need the seam allowance later to close the pocket bag.


Sew one pocket bag side panel to the matching side panel, right sides together.


Now you join the front piece to the side piece, right sides together. Sew once from the hem to the notch, the opening, and once from the armhole to the notch.

After that, you just need to sew the pocket bags together all the way around. Secure the bag to the hem of the front piece with a basting stitch and press the front center seam according to the pattern.

Secure the pocket openings with a bar tack. Now the front is ready…

…and can be attached to the back piece at the side and shoulder seams. Pay attention to the seam allowances in the pattern. Press these open afterwards.

Now take your cut cuff, place it right sides together with the hem of the jacket, and pin it according to the notches. As you sew, stretch the cuff evenly against the jacket hem. Press or fold the seam allowances upwards, as these will be sewn together from the inside later.


Now you can get out your suitable zipper or shorten it to the appropriate length: you can find more information in our sewing tips “Shortening a metal zipper”.
Position your zipper correctly on the cuff (at the notch from the fold) and stitch it, right sides together, to the front cut edge, aligning the edges. The pressed fold will later conceal the zipper teeth.

The facings are joined together, right sides facing, and the seam allowances are ironed open.

Next, place the hem of the facings, right sides together, against the inner cuff and stitch them together. Be sure to stop 1 cm before the hem so you can later sew the lining to the facing.
Next, fold everything right sides together, along the cuff fold, and sew the facing to the zipper and front piece, aligning the edges, up to the start of the zipper. Press the seam allowances to the inside.

Secure the wadding and outer fabric of the cut-out collar with a basting stitch all around.

Next, place both pieces wrong sides together and stitch the bottom edges together with a guide stitch.

Now, place the prepared collar, with the collar point aligned with the pressed fold, right sides together, against your finished neckline. Pay attention to the notches in the pattern and hold the collar in slightly.


The facing is placed at the neckline with the collar, right sides together, and stitched. Make sure that the pressed fold is now exactly at the end and that the zipper seam is shifted inwards.

Now let's move on to making the sleeves. Place the matching undersleeve, right sides together, onto the corresponding upper sleeve and sew the seam according to the pattern. Press the seam allowances open.

Next, close the inner arm seam and press the seam allowances open. Pay attention to the notches and seam allowances in the pattern.

The sleeve cuff is folded right sides together and sewn into a circle. Press the seam allowances open and then fold the folded edge wrong sides together.


Position the sleeve cuff with the seam against the inner arm seam, right sides together, and stitch everything together.

Finally, place the finished sleeve into the correct armhole, right sides together, aligning it with the notches in the pattern. Press the seam allowance towards the body at the front, back, and shoulder areas.

Now place the lining front pieces and lining side pieces right sides together and sew the side and center seams. Pay attention to the seam allowances in the pattern and press them to the back.

Now place the lining front pieces and the lining back piece right sides together and sew the shoulder seams. Pay attention to the seam allowances in the pattern and press them towards the back.

The two-seam seam of the lining upper sleeve is placed right sides together with the lining lower sleeve and sewn. Press the seam allowances to the back.

Sew the inner armhole seam together, right sides facing. Leave the left sleeve open by about 10 cm for turning the jacket right side out later. Pay attention to the seam allowance in the pattern and then press it towards the back.

Now you place the sleeve, right sides together, into the prepared lining piece and sew everything together.

Now stitch your prepared lining, right sides together, all the way around to your sewn-on facing.

Now sew the sleeves to the lining sleeve, right sides together. Secure the armhole point on the seam allowances of both fabrics.

You secure the shoulder point with an extra strip of lining at the seam allowances of both fabrics.

Now all you have to do is close the hem of your new jacket. Make sure to leave at least 10cm open at the center back.

After you have turned your jacket right side out through this opening,…

… you close your hem completely through the opening in the left sleeve.

Finally, you must sew this opening closed close to the edge. The turned-out jacket is then pulled into shape.

Stitch the ironed-over front edge all the way through, a presser foot's width away.
Your TIFFANY is finished !
If you get stuck or have any questions, please feel free to contact us by email at info@schnittmuster-berlin.de. We will reply as soon as possible.
Have lots of fun with your new designer piece!
Sincerely, your pattern team