Sewing instructions for Penelope trousers
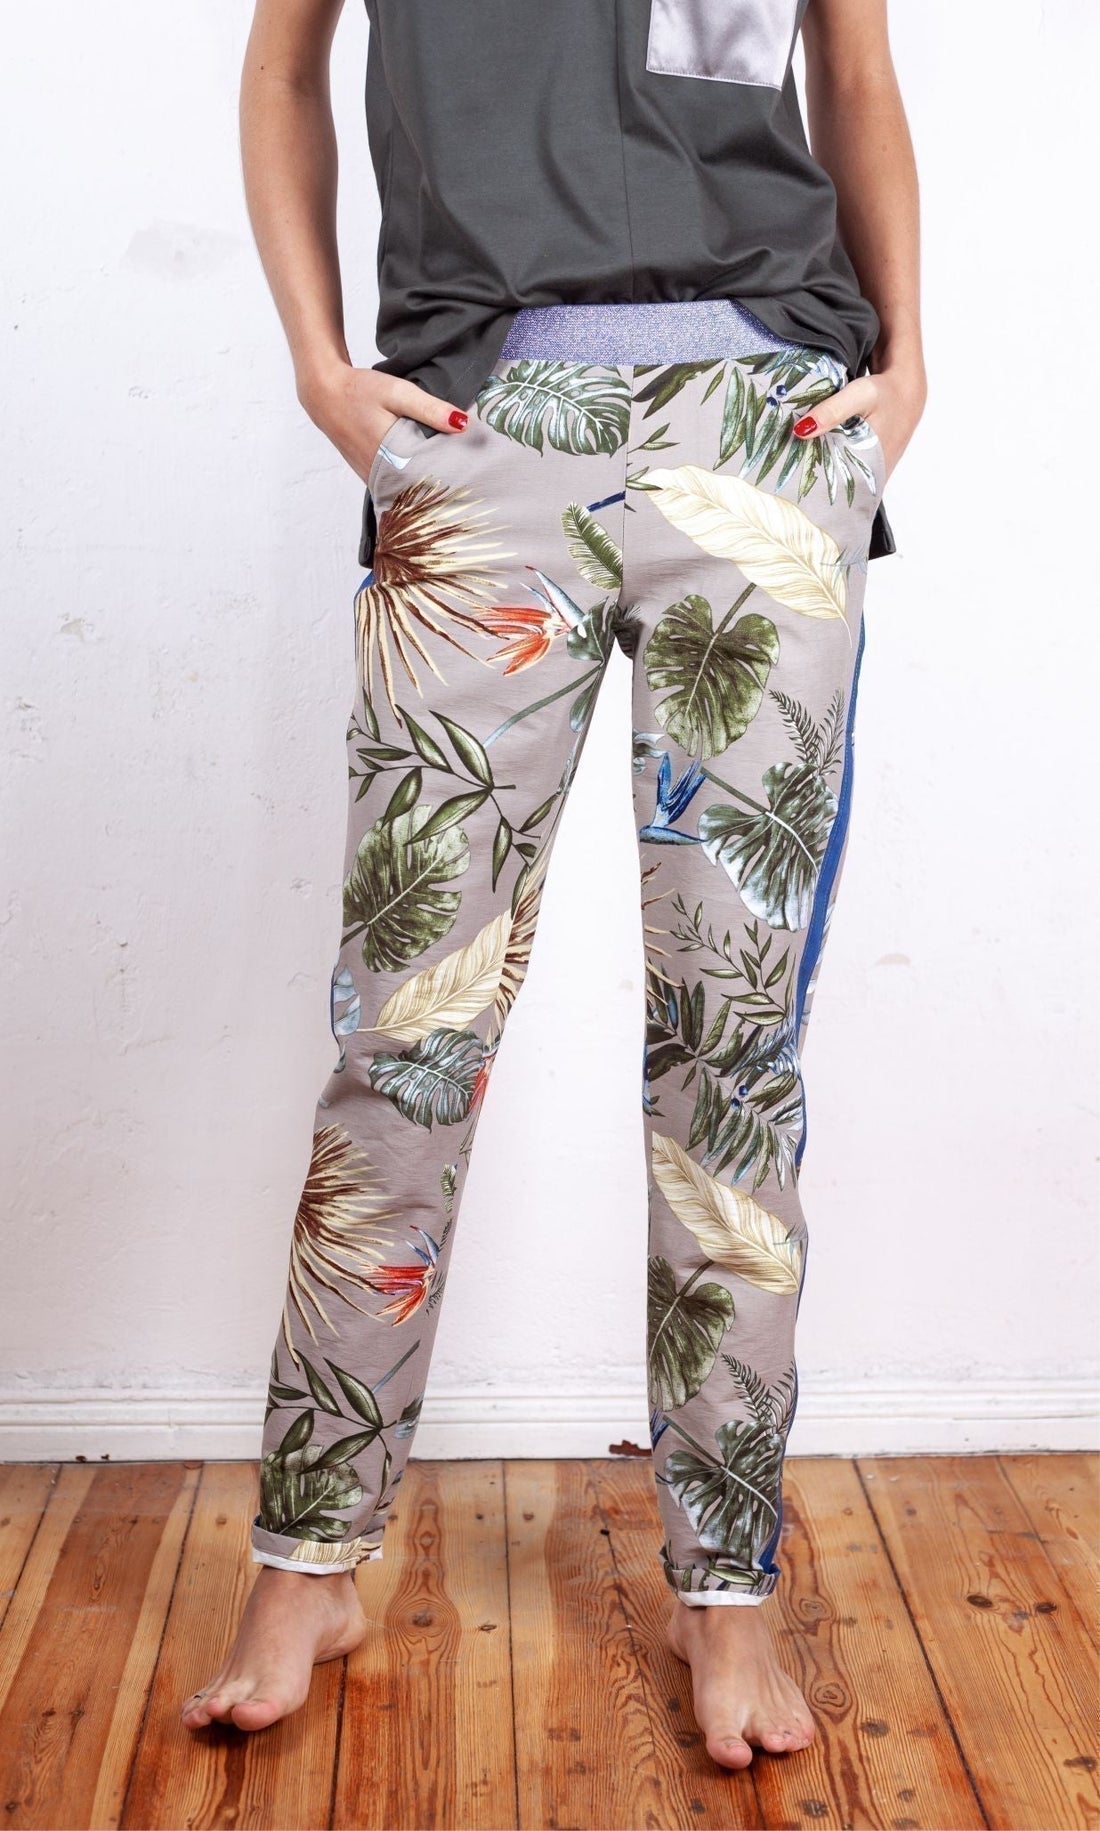
Women don't always want to wear jeans, so we've designed these jogger pants with a side stripe as a pattern for you. Penelope can be very sporty if you use sweat fabric, for example. It can be very elegant and perfect for an evening out if you use jacquard and satin, or a wool blend with contrasting stripes for everyday wear. Slanted front pockets and patch pockets at the back complete the look. The elastic waistband makes these pants suitable even for less experienced home seamstresses. Side length without waistband = 100cm.
The chic Penelope trousers with a contrasting side stripe from this pattern were sewn from a firmer trouser fabric.
→ To the pattern “Penelope Trousers”
Required materials:
We recommend classic trousers, wool blend or jacquard with contrasting inserts, but sweat fabric is also possible.
| Size 34-40 | Outer fabric | 1.45 m | 140 cm wide |
| Size 42-50 | Outer fabric | 2.10 m | 140 cm wide |
| Size 34-50 | Contrast fabric | 1.10 m | 140 cm wide |
| Size 34-40 | rubber band | 0.80 m | 4.5 cm wide |
| Size 42-50 | rubber band | 1.05 m | 4.5 cm wide |
All sizes of pocket edge with a form tape
Cutting:
Seam allowances are included - 1cm wide or as per marking clips!
 Cut the pattern pieces out of fabric and transfer the notches from the pattern. The colored clips in the images, along with the description, show you where to sew a seam. You can stabilize the slanted edge of the pocket opening with a shaping tape.
You need:
- 1x front trousers opposite
- 1x rear pants opposite
- 1x front pocket opposite
- 2x rear pocket
- 1x bundle in the break
- 1x side strip opposite
- 1x 4.5cm wide elastic band in your waist size
Sewing instructions
Seam allowances are included - 1cm wide or as per marking clips!
Neaten all edges of the back pockets.

Iron the edges using the pattern piece.

To ensure that the seam allowances on the side edges are not visible later when you sew the pocket opening, fold the top corner inwards at a 90° angle.

Using the markings on the pattern, pin the pocket to the right side of the back of the trousers and stitch it close to the side edges and both bottom edges. Securely bartack the seams at the pocket opening.

Repeat these steps on the other side. Your back pants are now ready.

Then continue with the front trouser pieces. Pin the pocket along the slanted edge, right sides together, to the slanted edge of the front trousers...

.. and sew the pocket along the slanted edge.

To ensure that no seam is visible from the right side later, but also that the inside pocket does not bulge out, stitch the just closed seam flat by placing the seam allowance towards the pocket and stitching it from the left side.

Fold the bag outwards again using the markings and neaten the bottom, open edge.

If you want, you can attach the pocket to the top and side of the trouser leg within the seam allowance.

Place the side strip right sides together on the side seam of the front trousers…

… and close this seam.

Then iron the seam allowance towards the trouser leg and stitch it close to the edge.

Then place the front trousers with the stripe right sides together on the matching back trousers and close the side seam here as well.

Iron the seam allowance towards the trousers again and stitch it close to the edge.

Then place the leg right sides together again and close the inner leg seam.

Depending on your fabric choice, neaten the hem and fold it inwards by 3cm.

Stitch the hem close to the edge. Repeat these steps for the other trouser leg.

Turn one trouser leg inside out, leaving the other right side out. Now tuck the leg into the leg, right sides together,...

...so that the inseams meet, as do the top hems. Close this crotch seam in one go and then turn the pants right side out.

Fold the waistband in half lengthwise, right sides together, and close the short side seam. Then, following the pattern, iron the hem in the center and both raw edges 1cm inward.

So you have the prepared waistband and the rest of the pants in front of you.

Unfold the waistband and pin it right side down to the inside edge of the pants. Make sure the notches line up. The side seam of the waistband meets the center back of the pants.
You can clearly see the ironed edge. Sew the waistband around the hem about 2mm to the side, within the seam allowance.

Because my fabric is so loose, I finished this seam even further. Fold the seam allowance toward the waistband...

...and fold the waistband over the just-closed seam so that it rests on the center ironed edge. Pin the waistband securely from the right side.

If you now sew the waistband 1mm from the edge, you'll automatically also touch the inner edge of the waistband. Leave a few centimeters open at the back of the pants.

Pull the elastic band through this opening using a safety pin.

Make sure the elastic doesn't twist inside. Sew the two elastic ends together securely, pull the elastic inward, and close the short opening.

Your waistband with inner elastic band is ready.

Congratulations, your PENELOPE is finished!

If you are stuck or have any questions, please feel free to contact us by email at info@schnittmuster-berlin.de. We will respond as soon as possible.
Have lots of fun with your new designer piece!
Sincerely, your Schnittmuster-Berlin team.