
Sewing instructions jacket Liz
This short, Chanel-style jacket pairs beautifully with long skirts or can be worn over a summer dress. The blazer features patch breast pockets and princess seams for a close fit. Liz is fully lined, giving it a proper jacket finish.
Length at back center = 51 - 59 cm
Roos was sewn from woven cotton in this tutorial.
Just so you know in advance:
Materials needed:
We recommend a boucle or linen fabric.
Sizes 34-42
- Outer fabric 1.60m (140cm wide)
- Lining fabric 1.20m (140cm wide)
Sizes 44-50
- Outer fabric 2.00m (140cm wide)
- Lining fabric 1.30m (140cm wide)
Sizes 34-50
- Insert 1.30 m (90 cm wide)
- Buttons, 5 pieces, 1.8 cm diameter
- Form tape size 34-50 = 2.20 m, 12 mm wide
Cut:
Seam allowances are included - 1cm wide or as indicated by the marking notches!
Cut out the pattern pieces from your outer fabric and interfacing. Place the fabric right side up. Align the selvedges parallel to the center so you can fold the back facing, collar stands, undercollar, and upper collar in half. All pattern pieces should be laid with the printed side facing up. Always align the grainline arrow in the same direction on all pieces, parallel to the selvedge of the fabric. Transfer all notches from the pattern by making a 3mm snip with scissors or using chalk. Markings define the positions of dart ends, pocket positions, etc. Transfer these either with chalk or pins. It's best to roughly cut out all outer fabric pieces that will be fully interfaced first. After you've secured the interfacing, cut them out precisely. There's also a video here about gluing and securing pattern pieces.

You will need the following fabric:
- 2x front part, mirror image
- 2x front side panel, mirrored
- 2x rear side panel, mirrored
- 2x back piece, mirror image
- 2x front pocket, mirrored
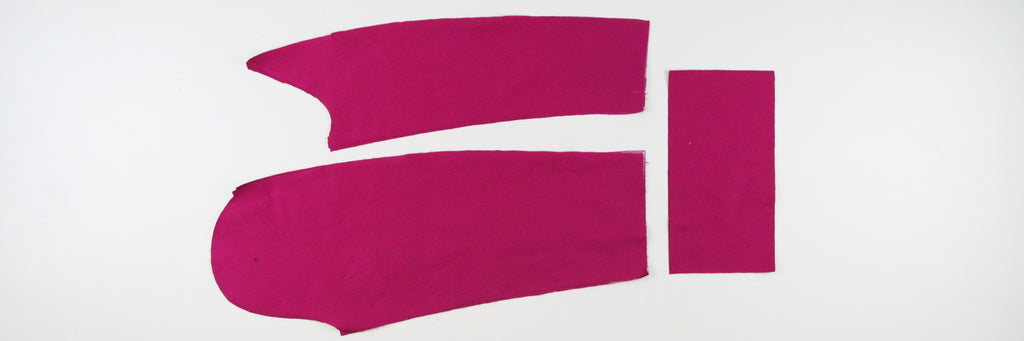
- 2x upper sleeves, mirrored
- 2x underarm sleeves, mirror image
- 2x cuff opposite


also with insert:
- 1x receipt at the back of the break
- 2x front receipt, opposite sides
- 1x upper collar in half
- 1x undercollar in slanted FDL
- 2x collar bar in fracture
- 2x front part partial fixation/plaque, opposite
- 2x back section partial fixation/plaque, opposite
- 2x front pocket
- 2x hem front piece, opposite
- 2x hem side panel front, opposite
- 2x hem of the back side panel, opposite side
- 2x hem back piece, opposite


also with shaping tape:
- 2x shoulder and neckline front piece
- 2x armhole front piece (after processing)
- 1x neck hole back piece (after processing)
- 2x armhole back piece (after processing)


You will need the following from the feed:
- 2x front part, mirror image
- 2x front side panel, mirrored
- 2x rear side panel, mirror image
- 1x back piece in half
- 2x bag, mirror image
- 2x upper sleeves, mirror images
- 2x lower sleeves, mirror images
Sewing instructions:
Seam allowances are included - 1cm wide or as indicated by the marking notches!
You will need a sewing machine to sew this jacket.
The colored lines in the pictures show you, in addition to the description, where to sew a seam or glue something.
When sewing, pay attention to the seam allowance included in the pattern. Seam allowances not specifically marked are 1 cm wide!
Have fun sewing!

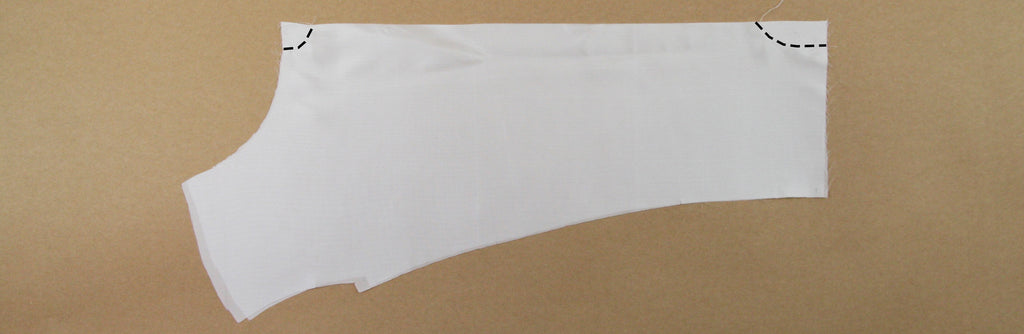
Place the front facing right sides together with the front pieces and stitch along the front edge with a 1cm seam allowance.

Iron the hem allowances of the front pieces and facings according to the pattern.


Sew the front side piece to the front piece, right sides together. Press the seam allowances open.
Now cover the armholes of the front piece with the bias tape.

Iron the fold of the front pocket opening according to the pattern.

Stitch the lining piece of the bag right sides together to the opening and iron the lining downwards.

Now place the lining right sides together with the outer fabric and sew the side seams. Press the seam allowances open and then turn the bag right side out.

Iron the bottom open seam over by 1cm.

Position the pocket on the front pieces according to the markings and stitch the pockets close to the edge.

Sew the back center seams right sides together and press the seam allowances open.

Sew the back side pieces to the back pieces right sides together and press the seam allowances open.
Now cover the armholes and the neck opening of the back piece with the bias tape.

Iron the hem of the back piece according to the pattern.

Place the back and front pieces right sides together and sew the shoulder seam. Press the seam allowance open.

Sew the side seams right sides together and press the seam allowances open. Pay attention to the seam allowances in the pattern.

Now take the back facing and sew it to the front facing, right sides together. Press the seam allowances open.

Attach the bridge to the upper/lower collar.

Next, press the seam allowances open and clip them slightly so they can spread apart a little while ironing. Topstitch close to the edge on both sides of the seam.

Place the upper and lower collars right sides together and stitch the upper seam.


Here you can see a detailed photo of the flat-stitched seam.

Iron the collars together.

Turn it right side out again and sew the short seams. Stop the seam 1 cm before the cut edge. Trim the corners of the collar...

...and iron the collar neatly.

Now you can sew the collar stand of the undercollar, right sides together, to the neckline of the jacket up to the notch. Pin the center back seam in place and smooth the remaining sections to the right and left.

Stitch the lapel corner of the front edge right sides together up to the notch. Make sure to align it precisely with the previously sewn seam of the placket.

Here you can see a close-up photo of the finished lapel corner. Trim the seam allowances of the corner slightly.

Now sew the collar's stand to the jacket's facing, right sides together.

Here you can see a detailed view of the finished collar.

Now press the seam allowances of the previously sewn sections open. Clip the seam allowances slightly, or trim them away if they are too thick.

To prevent the outer and inner seams from shifting, stitch the pressed-open seam allowances together. Use a single-sided presser foot for close stitching or stitch this section by hand.

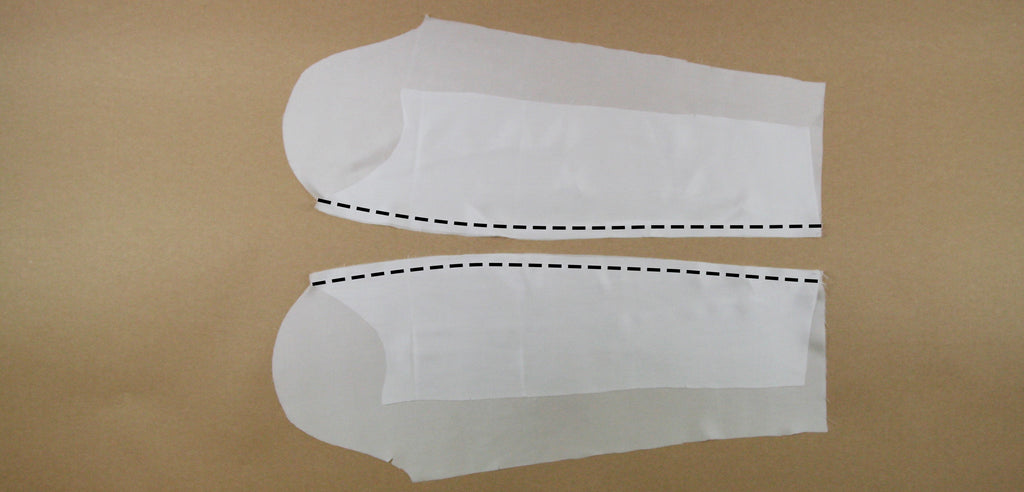
Now let's move on to the construction of the upper and lower sleeves. Stitch the outer arm seam right sides together and press the seam allowances open.

Sew the inner arm seam right sides together and press the seam allowances apart.

You iron the cuff inside out, inside out.

Sew the inner seams together, right sides facing, and press the seam allowances open.

Place the cuff right sides together on the sleeve and stitch them together, then press the seam allowances upwards.

The sleeve is finished and you can sew it right sides together into the correct armhole.

Now take the lining fabric and close the darts of the front pieces.

Place the front side panels against the front panels, right sides together, and sew the dividing seam. Press the seam allowances towards the side seam.
The back piece has a lining pleat. You sew this in at the top and bottom by sewing right sides together at the respective notches, as shown in the photo.

Place the back side panels right sides together on the back panel and stitch along the center seam. Press the seam allowances towards the side seam.

Place the front and back pieces together and sew the shoulder seam right sides together. Press the seam allowances towards the back.

Next, sew the side seams right sides together and press the seam allowances to the back.
Now move on to the sleeves and sew the upper and lower sleeves together, right sides facing. Press the seam allowances to the back.

Sew the inner arm seams together, right sides facing. Remember to leave a 10cm opening in the left sleeve.

Sew the lining sleeves into the armholes of the lining torso, right sides together.

Now you sew the lining to the facing of the outer fabric, right sides together.
Here's a video on how to insert a lining into a blazer.

Don't forget to sew the cuffs to the sleeve lining, right sides together.

The shoulders are also finished with an additional lining strip for freedom of movement. At the underarm points, you sew the seam allowances of the lining and outer fabric together.


Sew the hem of the lining and outer fabric right sides together, stopping just before the center back. Do this on both sides. Note the diagonal taper of the facing at the hem.

You close the open area around the back center of the hem by crawling through the open lining armhole and sewing the rest of the hem right sides together.

Then close the open area in the lining sleeve.

Make the buttonholes according to the pattern and sew the matching buttons onto the opposite side.
Your LIZ is finished!
If you get stuck or have any questions, feel free to contact us by email at info@schnittmuster-berlin.de.
We will reply to you as soon as possible.
Have lots of fun with your new designer piece!
Sincerely, your Schnittmuster-Berlin team.