Sewing instructions for jacket Nadja
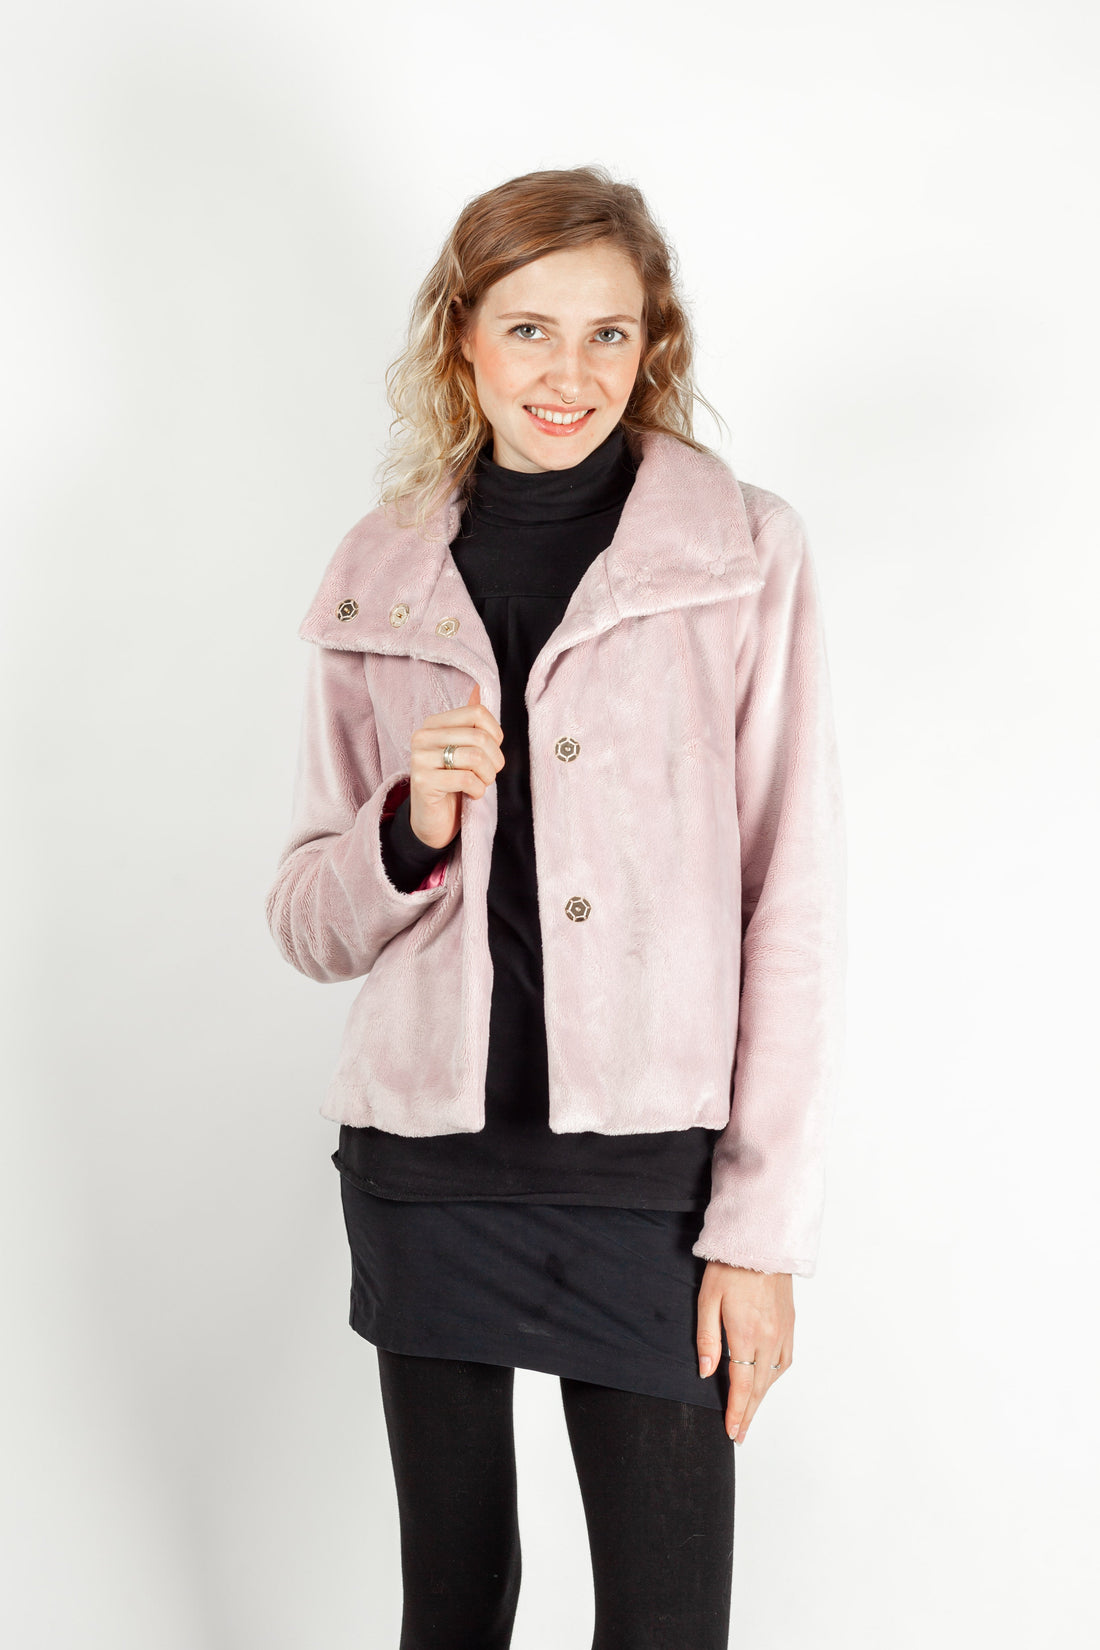
If you're looking for a great jacket pattern for the transitional period from autumn to winter, we recommend the Nadja jacket pattern. Nadja isn't particularly difficult to work with, as it only has seam pockets and no buttonholes. The slight A-silhouette allows for a variety of different combinations, e.g. over a dress , but also with wide-legged trousers such as Nuru or Anke . The style is very purist, with just a bust dart in the front and the high stand-up collar giving the jacket a clean look. To ensure that even less experienced sewers can work with this pattern, we've opted for a fastening solution with hand-sewn buttons.
Length at the center back = 57-65 cm.
Nadja in this tutorial was sewn from faux fur. This can't be glued, as otherwise the fur would be ironed flat, so we'll show you how to make it without interlining. However, we'll describe where and when interlining is typically used in each step.
Required materials:
We recommend wool, boucle or faux fur.
| Sizes 34-40 | Outer fabric | 1.50 m | 140 cm wide |
| feed | 1.25 m | 140 cm wide | |
| insert | 1.45 m | 90 cm wide | |
| Sizes 42-50 | Outer fabric | 2.05 m | 140 cm wide |
| feed | 1.45 m | 140 cm wide | |
| insert | 1.70 m | 90 cm wide | |
| Sizes 34-50 | Raglan padding thin | 1 | Couple |
| Snap fasteners | 5 | 2.2 cm diameter |
Cutting:
Seam allowances are included - 1cm wide or as per marking clips!
Cut out the pattern pieces from your outer fabric, lining fabric, and interfacing. Lay the fabric right side up. Place the selvedges parallel to the center so you can place the back, collar, back facing, and back pleat on the fold. The pattern pieces should all be laid with the writing facing up. Always align the grain arrow on all pieces in the same direction and parallel to the selvedge of the fabric. Transfer all notches from the pattern by making a 3mm slit with scissors or chalk and mark the ends of the darts. Notch the seam allowance along the fold, as this is always the center. Markings define the positions of dart ends, pocket positions, and much more. Transfer these either with chalk or pins. It's best to roughly cut all outer fabric pieces that will be completely covered with interfacing. After you have secured the interfacing, cut it out precisely. There is also a video here about gluing and fixing cut pieces.
To make feeding easier for you, we have a video for you here.
You will need fabric:
- 2x front part opposite
- 1x back part in the fracture
- 2x upper sleeves opposite
- 2x undersleeves opposite
- 2x pocket bag receipt opposite


also with insert (except faux fur):
- 2x plaque front part see photo
- 2x collar in the break
- 1x receipt at the back of the break
- 2x front receipt opposite

You will need from food:
- 1x back part-F in the fracture
- 2x front part-F opposite
- 2x upper sleeve F opposite
- 2x undersleeve F opposite
- 4x pocket bags opposite
Sewing instructions:
Seam allowances are included - 1cm wide or as per marking clips!
To sew this jacket you will need a sewing machine and an overlock sewing machine, or alternatively the zigzag stitch on your sewing machine to neaten the cut edges.
In addition to the description, the colored lines in the pictures show you where a seam needs to be sewn or something needs to be glued.
When sewing, pay attention to the seam allowance included in the pattern. Seam allowances not specifically marked are 1cm wide!
Have fun sewing! 

The side seams and shoulders are sewn together right sides together according to the pattern and then ironed back. 
The right upper sleeve is sewn to the right lower sleeve, right sides together… 
… and also closed the inner arm seam. 
However, an opening of about 20cm is left on the left sleeve so that the hem can be closed through this opening later. 
Turn both lining sleeves right side out and insert them into the previously prepared torso. Make sure the side seams and notches line up. 
 The pocket bag facings are neatened at the bottom edge.
Then it's sewn to the two back pockets. This prevents the lining from being visible when the bag pops open. 

The upper sleeve is sewn together with the matching under sleeve, right sides together… 
… and also closed the inner arm seam. 
Since we chose faux fur for our Nadja, we couldn't attach interfacing to the outer fabric. However, to prevent the fabric from stretching in the shoulder area, we cut the lining in the front piece and attached it to the width of our quilting foot. 
The outer collar also has a specially tailored lining (instead of interlining) to prevent it from stretching at the seams. 
This can then be turned all the way around with the inner collar. Slightly clip the seam allowances in the curves and trim the corners: 
Stitch the two raw edges together so they don't slip when sewing. 
The lining pocket bags are sewn right sides together to the front piece according to the markings in the pattern. 
The pocket bags with the stitched pocket bag facing are sewn right sides together to the back piece according to the markings in the pattern. 

 Now the pocket bags can be sewn together all around with 1cm.
Next, sew the sleeves into your jacket. Make sure the side seams and notches line up. 
Sew the prepared collar into the neckline with the top collar facing up. Note the notches in the pattern. 
Now sew the front facings together with the back facing. Spread the seam allowances (do not iron, as it will be fur). 
We've stitched a shaping tape (usually ironed) into the neckline to secure the shape and prevent stretching. We've also added shaping tape to the bottom edge of the hem for stability. 
A hanging strap made from lining is pinned between the facing and the jacket at the center back. The facing can then be sewn to the jacket, right sides together, all the way around. 

Next, you need the shoulder pads: Cut the raglan pad to the length of the shoulder and stitch it in place from the inside to one of the two seam allowances to prevent the pad from wobbling. Check that the pad is positioned correctly. 
Now comes the lining. Place the lining into your jacket as it will appear when sewn in, but with the right side of the lining facing the right side of the fabric. Now sew the lining along the facing edges, starting at the hem on one side and sewing in one piece all the way to the other end. 
To ensure more stability at the sleeve hem, you can attach it with a blind stitch. Then, sew the sleeve lining to the sleeve hem. To prevent it from twisting, we first push the lining properly into the sleeve and pin it to the hem. Only then do we pull out the sleeve and fold the rest. The seam allowances under the armhole of the lining and fabric are held together with a bartack. 
To ensure more secure hold on the jacket hem, you can also attach it with a blind stitch. Now you can close the hem. To do this, leave a gap in the middle so you don't have to turn the entire jacket through the armhole. Sew the remaining hem closed by reaching through the armhole and pulling out the still open hem to sew it shut. 
Now all you have to do is sew the armhole in the lining close to the edge and your jacket is finished. 
Finally, there are the five snap fasteners as per the pattern. Visible on the left side of the body... 
...invisible on the right side of the body. If you used faux fur, you should comb out the hair along the seam lines. This will make your seams disappear. This is best done with a coarse bristle brush or a fine comb.
Your NADJA is ready !
If you are stuck or have any questions, please feel free to contact us by email at info@schnittmuster-berlin.de. We will respond as soon as possible.
Have lots of fun with your new designer piece!
Sincerely, your Schnittmuster-Berlin team.