Sewing instructions denim dress Tonje
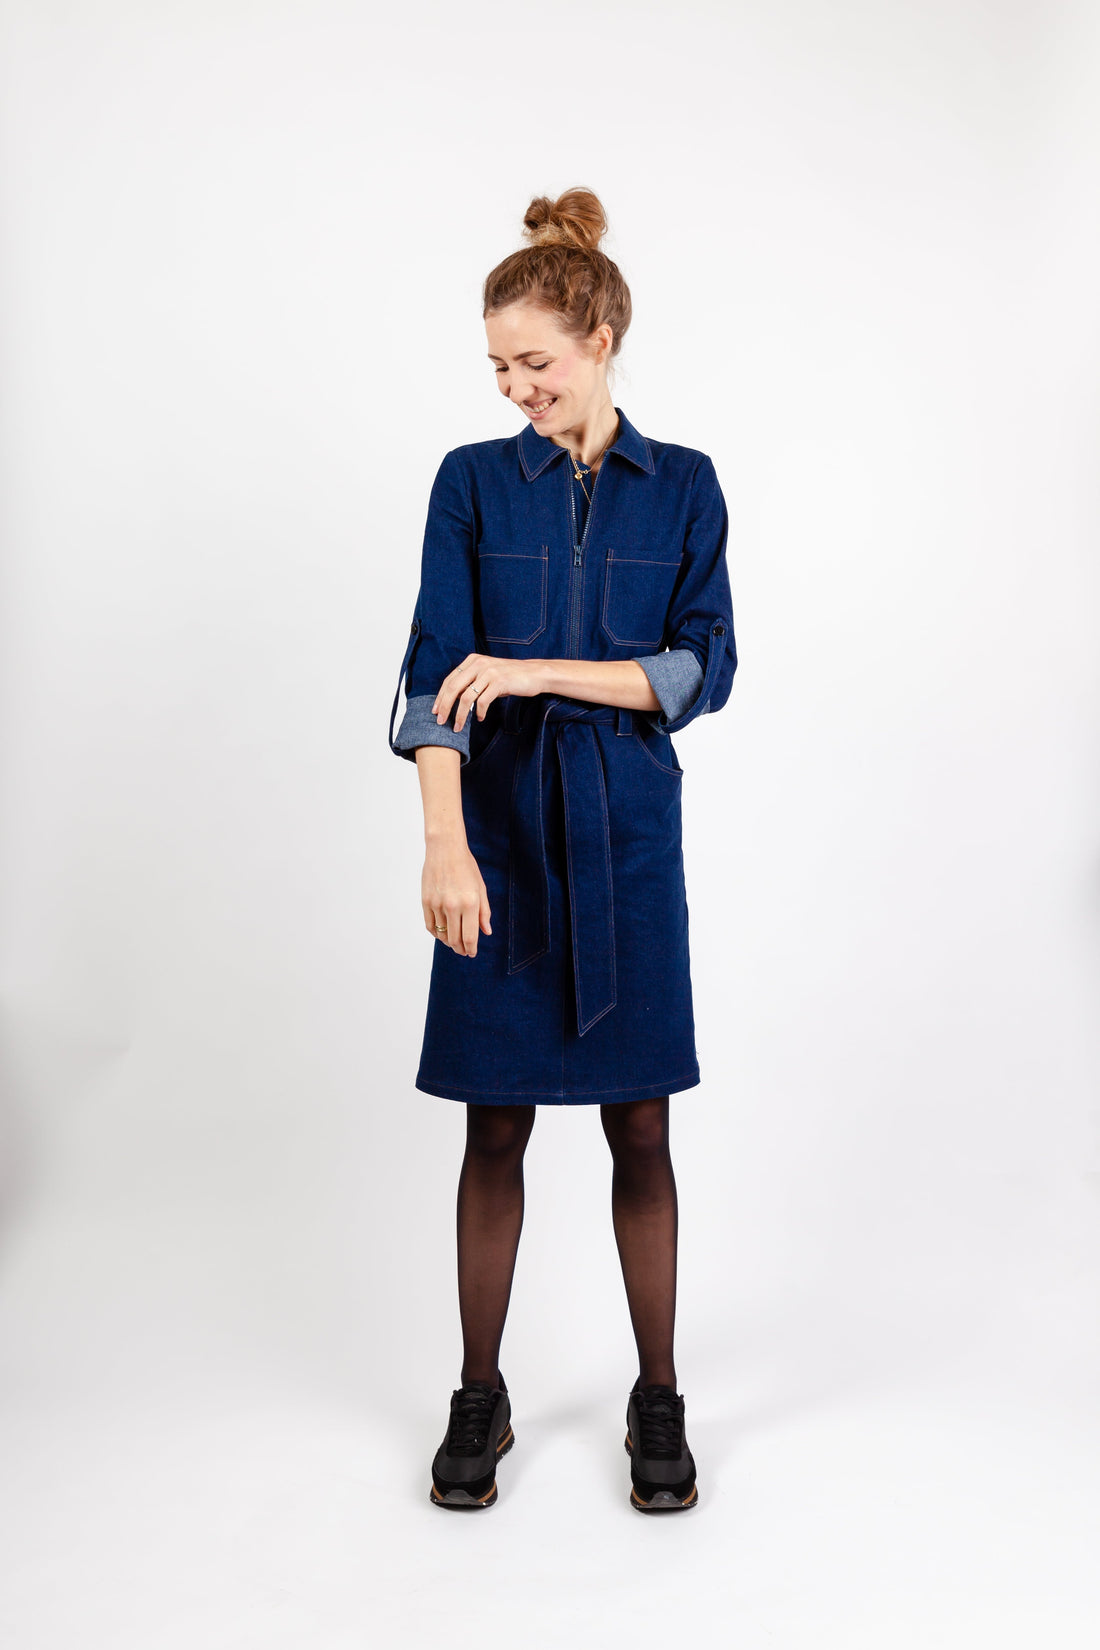
We're delighted with our fifth pattern in collaboration with Emilea . Manu's request was for a dress cut , sporty and, as you'll recognize from the other cuts, with many great highlights. Whether it's the topstitched seams, the zipper at the center front, or the sleeve that can be rolled up using a tab and button, they all combine to create a typical "Manu" piece. Classic denim details like the back yoke or the rounded pocket in the skirt section complement the look perfectly, and combined with denim, you can sew this modern classic yourself.
Length at the center back = 102 – 108 cm
In this tutorial, Tonje was sewn from denim fabric.
Required materials:
We recommend a denim fabric or a similar sturdy fabric with elastane and a thin cotton fabric as a contrast.
| Sizes 34-42 | Outer fabric | 2.30 m | 140 cm wide |
| Sizes 44-50 | Outer fabric | 2.90 m | 140 cm wide |
| Sizes 34-50 | contrast | 0.30 m | 140 cm wide |
| Sizes 34-50 | insert | 0.60 m | 90 cm wide |
| Sizes 34-50 | Ripper ntlb. | 1 piece | 55 cm long |
| Sizes 34-50 | buttons | 12 mm | 2 pieces |
Cutting:
Seam allowances are included - 1cm wide or as per marking clips!
Cut out the pattern pieces from your outer fabrics and interfacing. Lay the fabric right side up. Place the selvedges parallel to the center so you can place the back, back yoke, and outside collar on the fold. The pattern pieces should all be laid with the writing facing up. Always align the grain arrow on all pieces in the same direction and parallel to the selvedge of the fabric. Transfer all notches from the pattern by making a 3mm slit with scissors or chalk. Notch the seam allowance along the fold, as this is always the center. Marks define the positions of darts, pocket positions, and much more. Transfer these either with chalk or pins. It's best to roughly cut all outer fabric pieces that will be completely covered with interfacing first. After you've secured the interfacing, cut it out precisely. There's also a video here about gluing and securing pattern pieces.


 You will need fabric:
- 2x yoke-back in the fold
- 2x back part opposite
- 2x saddle-rear opposite
- 2x skirt-back opposite
- 2x breast pockets opposite
- 2x pocket receipts opposite
- 2x pocket receipts inside opposite
- 2x front part opposite
- 2x skirt-front opposite
- 2x receipt-front opposite
- 1x belt loops
- 1x zipper underlap
- 2x sleeves opposite
- 2x sleeve band
- 2x belts

also with insert:
- 1x upper collar
- 1x undercollar


also with forming tape:
- 2x inside pocket opening
- 2x facing front neck hole and front center
- 2x front part neck hole

You will need lining material:
- 2x pocket bags opposite
Sewing instructions:
Seam allowances are included - 1cm wide or as per marking clips!
To sew this dress you will need a sewing machine and an overlock sewing machine, or alternatively the zigzag stitch on your sewing machine to neaten the cut edges.
In addition to the description, the colored lines in the pictures show you where a seam needs to be sewn or something needs to be glued.
When sewing, pay attention to the seam allowance included in the pattern. Seam allowances not specifically marked are 1cm wide!
Have fun sewing! 
Start by sewing the back piece. To do this, sew the center back, right sides together, and neaten the seam allowances. Then press the seam allowances toward the wrong side of the body. 
Place the back skirt yokes right sides together and neaten them together. Press the seam allowances toward the wrong side of the body. 
Place the back skirt pieces right sides together and neaten them together. Press the seam allowances toward the wrong side of your body. 
Now sew the skirt yoke right sides together to the skirt part (neaten the seam allowances together and iron them down), 
… the back piece, right sides together, to the yoke (neaten the seam allowances together and press upwards), … 
… the outer upper yoke right sides together on the back piece and … 
...the inner yoke, right sides together, also onto the back piece. Iron both yokes upward so that the seam allowances disappear inward. 
The topstitching is close-edged and the width of the stitching foot. Start your topstitching at the center back and continue with the waist and saddle seam. 
Next, we'll finish the pockets on your dress. Trim the 
You also neaten up the curves of the two pocket facings. 


Now, sew the center front of the skirt pieces together, right sides together, up to the beginning of the zipper, and neaten the seam allowances. Press the seam allowances toward the right side of your body. 


Stitch the pocket openings close to the edge and the width of your stitching foot. Your pockets are finished. Stitch the center front close to the edge and press the top zipper sections 1 cm over. Note: Notch the seam allowances at the bottom to make it easier to iron the center front open. 

Next, sew the front pieces to the front skirt pieces, right sides together. Neaten the seam allowances together and press them upwards. Again, press the center front 1cm over. 
For the topstitching of the waist seam, topstitch close to the edge and to the width of your stitching foot. 


at . 
Fasten onto the dress at the markings in the front. 

The front piece is now prepared, and the matching zipper can be sewn visibly into the center front. Place it, right sides together, along the ironed front edge of the right and left sides of the body and stitch it in place. The ironed edge should be next to the zipper teeth. 


Stitch the shoulders and yoke seam close to the edge and to the width of the stitching foot. 
Iron the breast pockets all the way around according to the pattern and stitch the double folded opening close to the edge. 
Position your breast pocket according to the markings in the pattern or adjust the position based on your own body. Stitch both pockets close to the edge and the width of your stitching foot. 
Place the zipper underlap right sides together and sew the slanted corner according to the pattern. 
After turning and ironing into the fold, neaten the lower cut edge of the zipper underlap. 
The front of the receipt is finished all around according to the yellow lines in the photo. 

Place the zipper underlap, left to right, on the front facing of the right side of the body and stitch it in place. 
Now sew the prepared facing, right sides together, to the center front with the zipper already sewn on. Iron everything inside out: turn the facing inside out and place the zipper underlap under the zipper. 
Also sew the left body side facing to your center front. 
This is what both facings and the zipper underlap look like when processed from the inside. 

Secure the bottom edge with a stitching guide, pushing both fabrics together with the edges even to create the collar's roll width. Stitch the collar close to the edge and to the width of your stitching foot. 
Place the prepared collar, wrong side together, into the finished neck hole and stitch through to the notch. 
Now stitch the undercollar onto the back neck hole. 
Fold the facings over the front neck holes and stitch them through. Trim the seam allowances at the front corner. Check first that the facing has been folded over correctly. Slightly trim the seam allowances of the curve. 
Turn the upper collar over and stitch it close to the edge. Ideally, you'll stitch on the back in the shadow of the seam. 
Now stitch the zipper edges close to the edge and to the width of your stitching foot. 
… and secure the zipper underlap on the left facing. 
Now, sew the side seams of the front and back pieces right sides together. Neaten the seam allowances together and press them to the back. 
Iron the hem according to the pattern and stitch it close to the edge. 
Place the sleeve bands right sides together with 
Turn the ribbons right side out using a suitable tool and stitch the ribbons across the width of your stitching foot. 
The lower ends are cleaned up. 
Sew the ribbons onto the wrong side of the sleeve. Note the markings in the pattern. 
Now the sleeve can be sewn together, right sides together, and finished. Press the seam allowances to the back. 
Make buttonholes in both sleeve bands. 
Iron the hem of the sleeves twice and over and stitch it close to the edge. 
The button is attached to the right side of the fabric. 
Sew both sleeves right sides together into the armholes and neaten the seam allowances together. 
The final sewing step is the belt. To do this, place both belt pieces right sides together and sew the center back together. Press the seam allowances open. 
Then place the belt right sides together and sew it closed according to the yellow line in the photo. Note the open hole near the center back for facing the belt. 
Turn your belt inside out, turn it through the center hole, and close this opening by stitching both sides close to the edge and the width of your stitching foot.
Your TONJE is ready !
If you are stuck or have any questions, please feel free to contact us by email at info@schnittmuster-berlin.de. We will respond as soon as possible.
Have lots of fun with your new designer piece!
Sincerely, your Schnittmuster-Berlin team.