Sewing instructions for blouse Sil
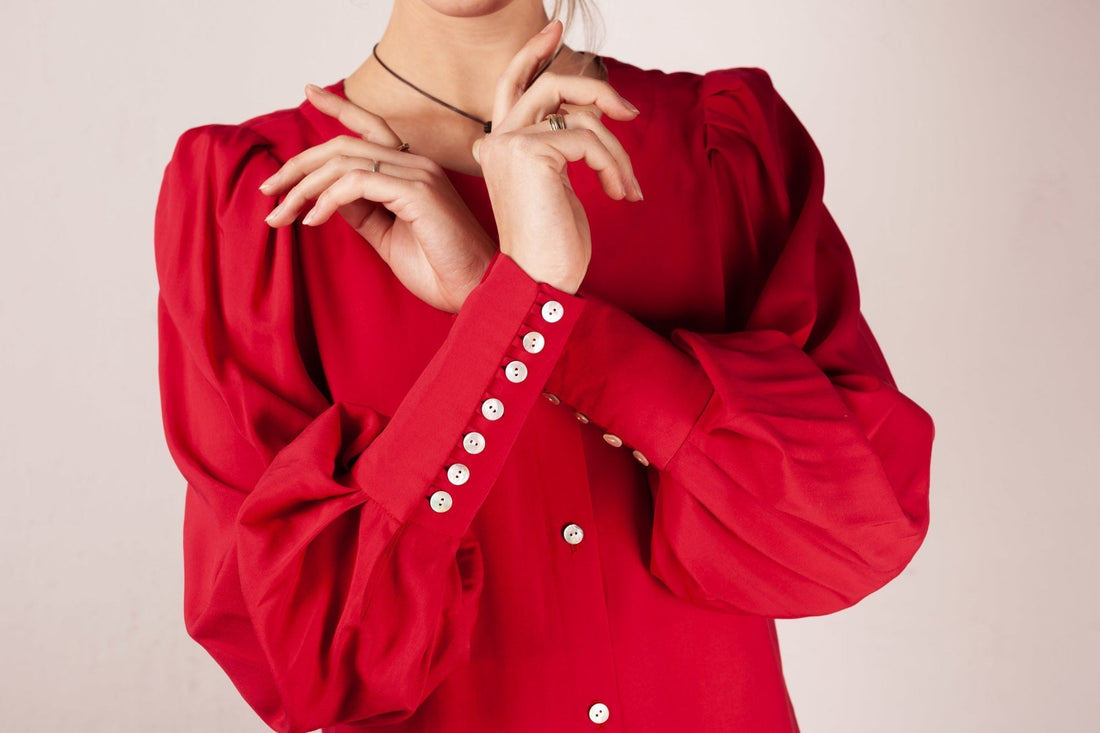
With blouses , the defining detail is often either the sleeve or the collar; with Sil, it's definitely the sleeve. Pleats at the armhole, the generous width is gathered at the bottom with a high cuff. The cuffs are closed with seven small eyelets and buttons, reminiscent of the 1940s style.
Length at the back center = 62 – 70 cm.
Sil was sewn in this pattern from a soft viscose.
Required materials:
We recommend a flowing silk , viscose , or polyester fabric . A plain fabric without any exciting patterns is also particularly recommended.
| Sizes 34-42 | Outer fabric | 1.70 m | 140 cm wide |
| insert | 60 cm | 90 cm wide | |
| Sizes 44-50 | Outer fabric | 2.00 m | 140 cm wide |
| insert | 60 cm | 90 cm | |
| Sizes 34-50 | buttons | 19 pieces | 8-10 mm diameter |
Cutting:
Seam allowances are included - 1cm wide or as per marking clips!
Cut out the pattern pieces from your outer fabric and, where necessary, from the interfacing. Lay the fabric right side up. Place the selvedges parallel to the center so you can place the back and yoke on the fold. The pattern pieces should all be laid with the writing facing up. Always align the grain arrow on all pieces in the same direction and parallel to the selvedge of the fabric. Transfer all notches from the pattern by making a 3mm slit with scissors or chalk and mark the ends of the darts. Notch the seam allowance along the fold, as this is always the center. Cross marks define the positions of dart ends, pocket positions, and much more. Transfer these either with chalk or pins. It's best to roughly cut all outer fabric pieces that will be completely covered with interfacing first. After you have secured the interfacing, cut it out precisely. There is also a video here on gluing and securing pattern pieces.


You will need fabric:
- 1x back part in the fracture
- 2x pass in the fraction
- 2x front part opposite
- 2x sleeves opposite
- 2x cuff loops
- 2x sleeve slits

also with insert:
- 1x back part in the fold
- 2x facing front part opposite
- 4x cuff sleeves opposite
- 4x folding supports opposite
Sewing instructions:
Seam allowances are included - 1cm wide or as per marking clips!
To sew this blouse, you'll need a sewing machine and an overlocker. Alternatively, you can use your sewing machine's zigzag stitch to neaten the cut edges. The colored lines in the images, in addition to the description, show you where to sew or glue something.
When sewing, pay attention to the seam allowance included in the pattern. Seam allowances not specifically marked are 1cm wide!
Have fun sewing!

We start by sewing the bust darts. The marking defines the point of the dart, and the two notches on the side seam define the depth of the dart. To do this, place the notches on top of each other and sew on the wrong side of the fabric up to the marked dart point. Beforehand, draw a line with tailor's chalk to ensure you don't over-stitch or under-stitch and that the side seam ends nicely and straight. Press the dart's contents upwards.
 Now we'll take the two cut yokes and the back piece. Both yokes are placed against the back piece and stitched in place. Outside right sides together, inside right sides together.
  Both yokes are turned out, ironed upwards, and joined to the shoulder seams of the front piece. In the photo, you can see that both yokes were sewn on at the same time. To do this, crawl from the open neckline or armhole into the shoulder seam, grab the three seam allowances, and sew everything together. There are various techniques for sewing in a back yoke, all of which are great. You can find the rolled version here: Burrito Method
 This is what your finished yoke looks like. If you want to further secure the yoke, you can topstitch the seams to the width of your stitching foot.
 Next, we close the torso. To do this, sew the front and back pieces right sides together with a 1.5cm seam allowance. The seam allowances are neatened together and ironed to the back.
 Facings reinforce a neckline and give it a neat look by facing everything together. To do this, we join the front facing pieces to the back facing. Then press the seam allowances open.
 The lower, longer curve is ironed over by 1cm for easier processing later.

Now we can tackle the prepared facing and the body piece. First, press the button placket according to the pattern (twice folded), then turn the facing to the front edge. To do this, sew the facing to the front piece, right sides together, along the first fold/first notch. Do this on both sides of the front edge. For clarity, both pattern pieces are shown together.  Fold 1 is in its ironed position, while fold 2 is opposite to its ironed position. This allows the facing to be turned all the way around with the neckline. You can see in the photo that I didn't iron the button placket beforehand, but I recommend doing so.
 The seam allowances of the facing and body are cut in the curve.
 Next, the seam allowance is stitched flat, as far as possible . This method not only makes it easier to iron, but also ensures that the facing, if not stitched separately, will automatically fold inward. Only the facing is stitched, close to the edge of the seam allowance. The stitching line is then visible only from the inside left side, not from the right side.
Open the button placket, fold the hem twice and then stitch it 0.7 cm wide.  Now fold the button plackets back along the ironed folds and stitch the facing and the button placket in one go. This will secure the facing to the body and the button placket as well. To do this, stitch from the wrong side of the fabric, close to the edge, starting at the left hem, over the facing, and ending at the right hem. Note: The yellow lines in the photo define the finished stitching line, as seen from the right side of the fabric.
 Cuff with slit
Start by creating the slit. To do this, place the slit strip, right side of the sleeve, on top of the right side of the strip. Now sew the strip to the open notch with a 0.7 cm seam allowance. At the tip of the slit, the seam allowance is only about 2 mm (see photo). 

The slit strip is ironed over, folded twice (the sewing line of the strip attachment should be covered) and stitched through from the right side, close to the edge .
The upper corner of the slit is fixed on the inside of the sleeve with a diagonally upward seam. 
Now the slit can be finished and ironed to the correct side. The photo above shows the left arm for orientation; a slit can always be opened backward when worn. The ironed edge can be stitched to the hem to help. Trim the slit strips at the beginning to match the length of the sleeve. Once the slit has been created, the sleeve hem pleats can be folded together as shown in the pattern. Use the notches and arrows in the pattern as a guide. Secure the pleats with a stitch the width of your topstitcher.
 Now close the sleeve seam and neaten the seam allowances. These are then ironed back.
For the eyelets for closing the blouse, you can also watch our sewing video on the pulled-through roll. The strip, cut on the bias, is placed right sides together along the fold. Starting at the top with a wide opening (like a school cone), shrink it and topstitch to the fold with the width of your stitching foot. Using a thick thread and a large needle, the roll can be pulled through. Push the blunt end of the needle into the opening and pull the seam allowance through. Your cuff loops are ready.
Cut the finished cuff loops 14 times in total with a length of 5cm.  Seven of the cut ribbons are stitched to a cuff with a 0.5cm seam. Make sure to notch the position indicated in the pattern. The other seven ribbons are secured to the opposite cuff. The photo above shows the cuff of the right sleeve.
 Now you can neatly turn the cuff. To do this, stitch both pieces right sides together, with a one-centimeter gap all the way around. Trim the corners slightly so that the corner doesn't become too thick when turned.
  Work on a right cuff as well as an opposite left cuff.
  Then, iron the raw edges over by 1 cm, leaving 1-2 mm of the inner side exposed. Sew the cuff to the prepared sleeve from the outside in, 1 cm apart.

Iron the seam slightly and then stitch through from the right side in the shadow of the seam. Make sure you stitch the inner cuff close to the edge, thus securing it.  The sleeve can now be finished and sewn into the armhole. To do this, fold the pleats together as described in the pattern and sew them in place with a stitch the width of a quilting foot.

The finished sleeve is sewn into the armhole with a 1cm seam allowance, and the seam allowances are neatened. Note the notches in the pattern.
 The pleat support is folded in half and neatened along the long side. The short side is gathered to 20 cm and also neatened together. Here's a video showing how I made the pleat support.
 The blouse is almost finished. Now all that's left to do is sew on all the buttons on the cuffs...
 ... on the right side of the body, the buttonholes are pierced as shown in the pattern and the buttons in the front part on the left side of the body are sewn on accordingly.
Your SIL is ready !
If you're stuck or have any questions, please email us at info@schnittmuster-berlin.de. We'll respond as quickly as possible.
Have lots of fun with your new designer piece!
Best regards, your pattern team!