Sewing instructions for summer dress Merissa
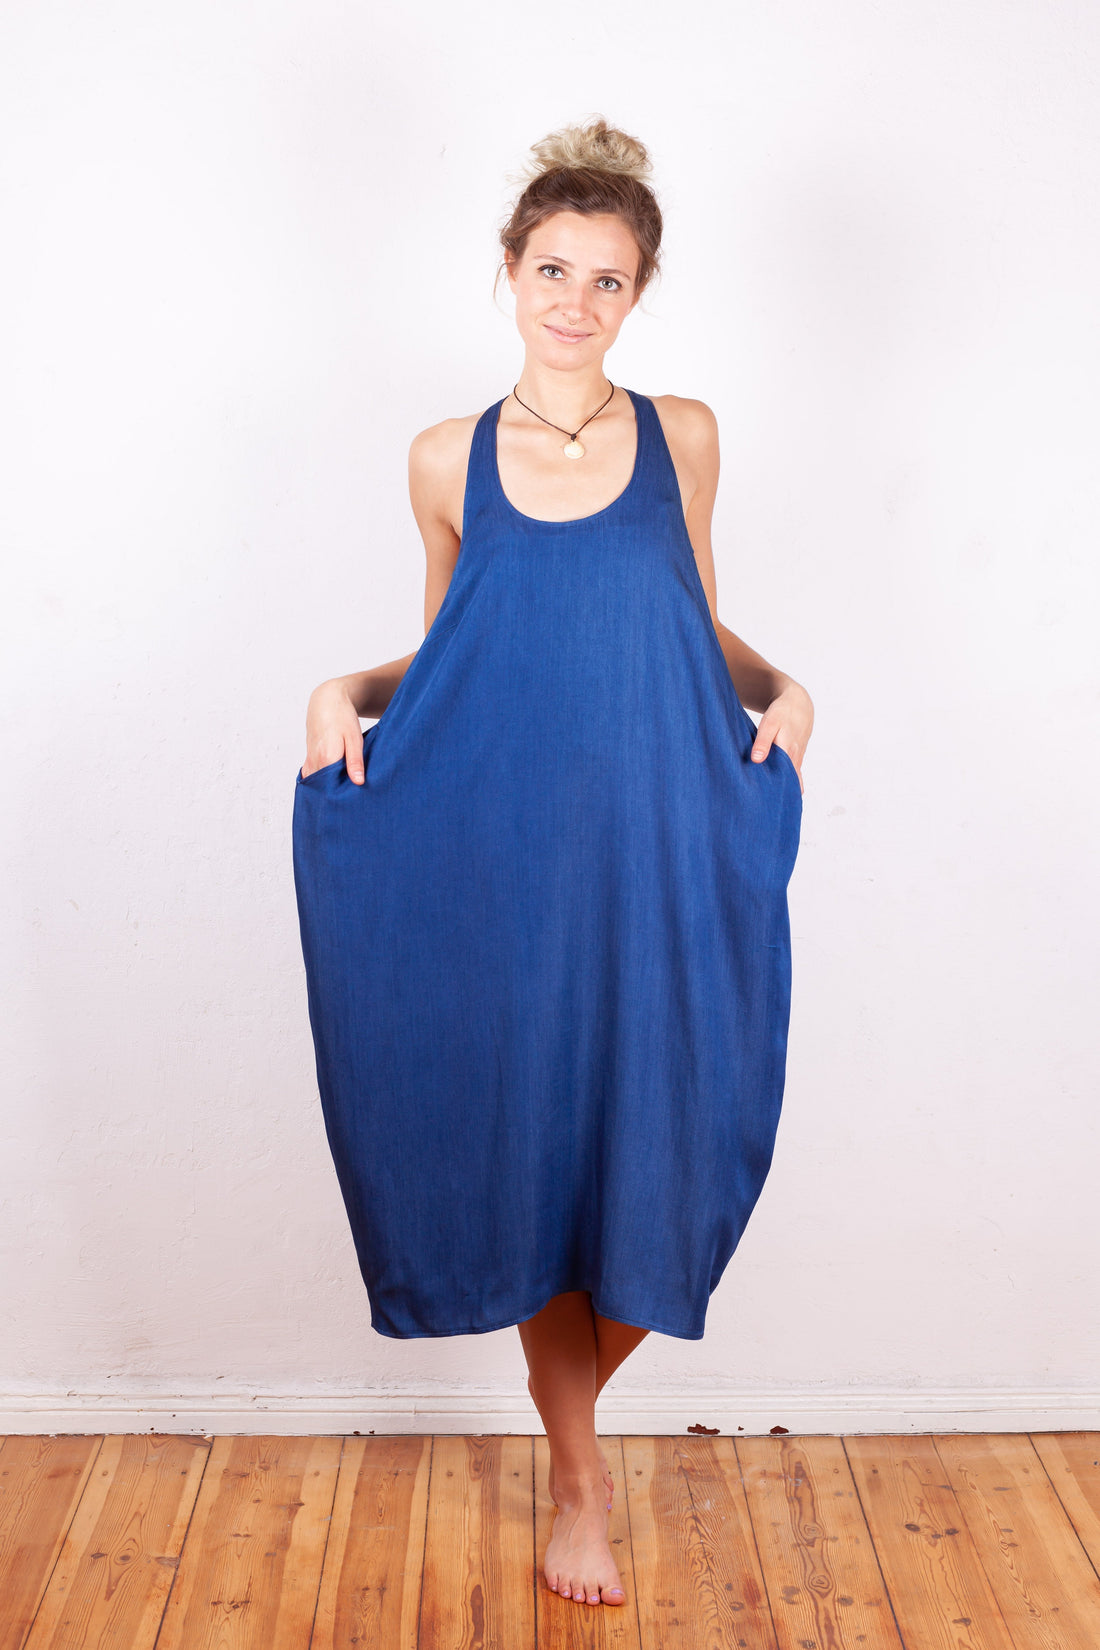
Sew this dreamy summer dress for yourself; the cut is truly unusual and special. The side seam has a striking egg-shaped silhouette, so we recommend using a flowing fabric. The racerback neckline at the back emphasizes your beautiful back and sits perfectly even in a woven fabric. With the integrated side seam pockets, Merissa is a casual and very sporty summer dress .
Length at the back center = 113 cm
Merissa was sewn in this pattern from a flowing, soft denim fabric.
Required materials:
We recommend a flowing viscose, silk or cotton.
| Sizes 34-42 | Outer fabric | 2.00 m | 140 cm wide |
| Sizes 44-50 | Outer fabric | 2.40 m | 140 cm wide |
| Sizes 34-50 | Fixing tape | 2.50 m | 1 cm wide |
Cutting:
Seam allowances are included - 1cm wide or as per marking clips!
Cut the pattern pieces from your outer fabric. Lay the fabric open with the right side facing up. Position the selvedges parallel to the center so you can place the front piece on the fold. All pattern pieces should be placed with the lettering facing up. Always align the thread take-up arrow on all pieces in the same direction and parallel to the selvedge of the fabric. Transfer all notches from the pattern by making a 3mm cut with scissors or chalk, and mark the ends of the darts. Notch the seam allowance along the fold, as this is always the center. Drill holes define the positions of darts, pocket positions, and much more. Transfer these with either chalk or pins .

 You will need fabric:
- 1x front part in the fracture
- 2x back part
- 1x front part facing in the fold
- 2x back part facing
- 4x pocket bags
Sewing instructions:
Seam allowances are included - 1cm wide or as per marking clips!
To sew this dress you will need a sewing machine and an overlock sewing machine, or alternatively the zigzag stitch on your sewing machine to neaten the cut edges.
In addition to the description, the colored lines in the pictures show you where a seam needs to be sewn or something needs to be glued.
When sewing, pay attention to the seam allowance included in the pattern. Seam allowances not specifically marked are 1cm wide!
Have fun sewing!  After the cutting has been prepared, you can first take the front piece with the marked darts and process it accordingly.
  The resulting dart content is ironed upwards.
  Next, we can tackle the back piece and neaten the raw edge of the center back…
  … and then sew them together right sides together with 1cm.
  The seam allowances are then ironed apart.

The side seams of the front and back are finished.  The Merissa dress features practical side seam pockets. The back pockets are finished along the straight cut edge.
  Sew the pocket pouch to the back piece, right sides together, according to the markings in the pattern. Make sure to only stitch up to the notches. The second notch from the top in the pattern serves as a guide to indicate the "top" position. In the photo, you can see the pocket opening on the right side of the body.
  Next, the seam allowance of the back piece is flat-stitched onto the pocket bag. Make sure to flat-stitch only up to the notches (see photo).
  Sew the opposite pocket bag to the front piece of the right side of the body.
Work both sides of the body equally.  Now let's move on to the facings. Before sewing the facings together, the curves of the front facing and the outer strap section of the back facing are ironed in place with warp-reinforced shaping tape (see photo).
  First, the bottom edge of the front facing is neatened. Then, just the neckline is sewn to the front piece with a 1cm seam allowance.
  Cut the seam allowances of the neck hole.
  The seam allowance is now stitched flat, visible on the front facing.
  Now the armhole can be sewn together, right sides together, and turned together. For this, the seam allowances in the curves are also trimmed slightly.
Turn the straps over to the right and iron everything flat. 
The back facings are sewn together at the center back with a 1cm seam, right sides together, and the seam allowances are ironed open.  Now the entire bottom edge can be neatly cleaned…
  … and stitched to the back piece with 1cm.
The straps of the finished front piece are pushed right sides together to the top opening and double-stitched with 1cm of stitching. Make sure the center back meets exactly on the straps.  Now the corners of the seam allowances need to be trimmed away so they don't get in the way when turning and make the seam too thick. The seam allowances at the corner of the back piece are also trimmed, so the seam allowance can spread when turning.
  Here you can see the final result of the straps on the front and back.
  Everything is ironed out neatly.
  Before we can close the side seams, the pocket bags are sewn together with a 1.5cm seam allowance. Make sure to end at the visible seams of the front and back pieces. The pocket bags can then be neatened together.
Start by closing the side seams at the top, leaving a 1cm seam allowance. To do this, fold the facings upward and stitch them right sides together, leaving a 1cm seam allowance. End at the top meeting point of the side pocket seams. Skip to the pocket and start again at the bottom meeting point (see photo). Then press the seam allowances open. Work both sides equally.  Here you can see what the side seam looks like from the inside with the facings at the end.
  And because the front facing tends to fold up and show through, I stitched the straps all the way around, using the width of a stitching foot. This keeps everything flat and is doubly secured. You can choose this option according to your taste.
  Finally, the hem is finished as indicated in the pattern. It is double-pressed and stitched.
Your MERISSA is ready !
If you are stuck or have any questions, please feel free to contact us by email at info@schnittmuster-berlin.de. We will respond as soon as possible.
Have lots of fun with your new designer piece!
Sincerely, your Schnittmuster-Berlin team.