Nähanleitung Stufenrock Roos

Nähanleitung Stufenrock Roos

---> ENGLISH VERSION BELOW! <---

Weite Stufenröcke verströmen ein Gefühl von Freiheit und das Lebensgefühl der 70iger Jahre. Durch den Ansatz der breiten Stufe im unteren Rockbereich bekommt Roos die lässige Weite, die jede Bewegung locker mitmacht. Durch den Ansatz des Gummibunds lässt sich der Stufenrock unkompliziert anziehen und schafft zusätzliche Bequemlichkeit.

Länge in der hinteren Mitte = 92 cm

Rose wurde in dieser Anleitung aus einer Viskose Webware genäht.

→ Zum Schnittmuster “Rose”

Vorab für dich als Info:

Benötigtes Material:

Wir empfehlen dir einen fließenden Stoff wie Viskose oder Seide.

    Größen 34-50

    • Oberstoff 1,90m (140cm breit)

    • Gummi 0,65 - 1,05 m 3 cm breit

    Zuschnitt:

    Schneide die Schnittteile aus deinem Oberstoff und aus Einlage zu. Lege den Stoff mit der rechten Stoffseite nach oben. Lege die Webkanten parallel zur Mitte, damit du Rock obere Stufe, Rock untere Stufe und den Bund im Bruch auflegen kannst. Die Schnittteile sollten alle mit der Schrift nach oben aufliegen. Richte den Fadenlauf-Pfeil stets bei allen Teilen in die gleiche Richtung aus und parallel zur Webkante des Stoffes. Übertrage alle Knipse aus dem Schnittmuster durch einen 3mm langen Einschnitt mit der Schere oder mit Kreide. Markierungen definieren Positionen von Abnäherendungen, Taschenpositionen, u.v.m. Übertrage diese entweder mit Kreide oder Stecknadeln.

    Du benötigst aus Stoff:

    • 1x Bund im Bruch
    • 2x Rock obere Stufe im Bruch
    • 2x Rock untere Stufe im Bruch

    Nähanleitung:

    Für das Nähen dieses Rockes benötigst du eine Nähmaschine und eine Overlock-Nähmaschine, alternativ dazu den Zickzack-Stich deiner Nähmaschine zum Versäubern der Schnittkanten.

    Die bunten Linien auf den Bildern zeigen dir zusätzlich zur Beschreibung, an welchen Stellen eine Naht zu nähen oder etwas zu kleben ist.  

    Achte beim Nähen auf die im Schnitt enthaltene Nahtzugabe. Nicht extra gekennzeichnete Nahtzugaben sind 1cm breit!  

    Viel Spaß beim Nähen!

    Bügle den Saum der unteren Stufe doppelt ein-...

    ... und um.

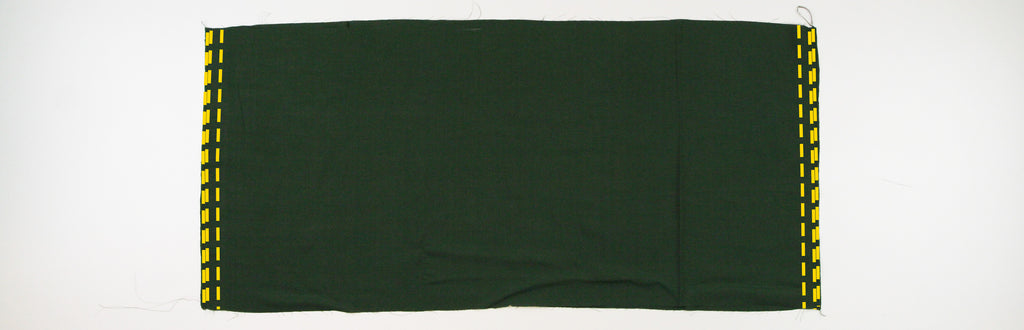
    Schließe die Seitennähte der oberen Stufe rechts auf rechts und versäubere die Nahtzugaben zusammen. Bügle die Nahtzugaben nach hinten.

    Schließe die Seitennähte der unteren Stufe rechts auf rechts und versäubere die Nahtzugaben zusammen. Bügle die Nahtzugaben nach hinten.

    Jetzt kräuselst du die oberen Kanten der Stufen. Entweder hast du einen Kräuselfuß und die Strecke passt dann auch an die Schnittteile oder du steppst zwei Hilfslinien und kräuselst mit der Hand.

    Hier gibt es auch ein Video zum kräuseln von Kräuselfalten.

    Hier siehst du ein Detailfoto der Kräuselung.

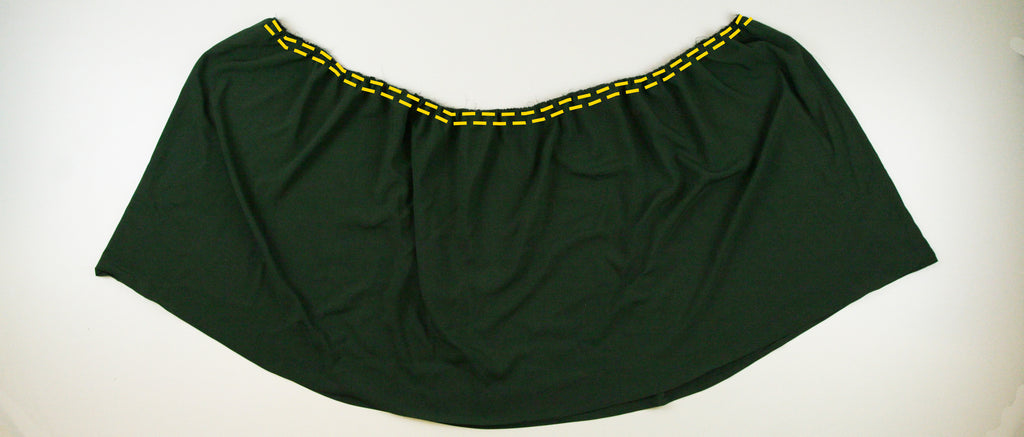
    Auch die untere Stufe kräuselst du rundherum.

    Anschließend steppst du die obere Stufe rechts auf rechts auf die untere Stufe und versäuberst die Nahtzugaben zusammen.

    Bügle den Bund links auf links im Umbruch.

    Steppe den Bund an den schmalen Seiten rechts auf rechts aufeinander. Beachte eine Öffnung im Innenbund für das Gummiband zu lassen. Bügle die Nahtzugaben auseinander.

    Der Bund hat eine sogenannte Biese am oberen Umbruch. Steppe eine Naht steppfußbreit rundherum. (Zur Sicherung der beiden Stofflagen kannst du zusätzlich noch eine Hilfsnaht steppfußbreit an der unteren Kante nähen.)

    Verbinde nun den Bund rechts auf rechts mit der oberen Stufe und versäubere die Nahtzugaben zusammen. Bügle die Nahtzugaben nach unten.

    Schneide das Gummiband in deiner richtigen Größe zu und ziehe es mit einer Sicherheitsnadel durch die Öffnung im Innenbund.

    Schließe das Gummiband zur Runde.

    Abschließend steppst du den bereits gebügelten Saum knapp Kante rundherum fest.

    Fertig ist deine ROOS!

    Wenn du mal nicht weiter weißt, oder falls du Fragen hast, melde dich gern per Email unter info@schnittmuster-berlin.de.

    Wir antworten dir so schnell wie möglich.

    Hab ganz viel Freude mit deinem neuen Designerstück!

    Herzlichst dein Schnittmuster-Berlin Team.

    PINTERESTFOTO


    --> ENGLISH VERSION <--

    Sewing instructions tiered skirt Roos

    Wide tiered skirts exude a feeling of freedom and the lifestyle of the 70s. Due to the approach of the wide part in the lower part of the skirt Roos gets the casual width, which loosely follows every movement. The elastic waistband makes the tiered skirt uncomplicated to put on and creates additional comfort.

    Length at the center back = 92 cm

    Rose was sewn in this tutorial from a viscose woven fabric.

    → To the pattern "Rose

    In advance for you as info:

    Material needed:

    We recommend a flowing fabric like viscose or silk.

    Sizes 34-50

    • Outer fabric 1.90m (140cm wide)
    • elastic tape 0.65 - 1.05 m 3 cm wide

    Cut:

    Cut the pattern pieces from your outer fabric and from interlining . Lay the fabric right side up. Lay the selvages parallel to the center so you can place skirt top part, skirt bottom part and the waistband in the fabric fold . The pattern pieces should all lie with the lettering facing up. Always align the threadline arrow in the same direction for all pieces and parallel to the selvage edge of the fabric. Transfer all notches from the pattern by making a 3mm incision with scissors or chalk. Marks define positions of dart ends, pocket positions, and more. Transfer them either with chalk or pins.

    You need fabric:

    • 1x waistband in the fabric fold
    • 2x skirt upper part in fabric fold
    • 2x skirt lower part in fabric fold

    Sewing instructions:

    To sew this skirt you will need a sewing machine and an overlock sewing machine, alternatively use the zigzag stitch on your sewing machine to neaten the raw edges.

    In addition to the description, the coloured lines on the pictures show you where to sew a seam or glue something.  

    When sewing, pay attention to the seam allowance included in the pattern. Seam allowances that are not specially marked are 1cm wide!  

    Have fun sewing!

    Double-press the hem of the bottom part ...

    ... and around.

    Close the side seams of the upper part right sides together and serge the seam allowances. Press the seam allowances to back.

    Close the side seams of the bottom part right sides together and serge the seam allowances. Press the seam allowances to back.

    Now crimp the upper edges of the steps. Either you have a ruffling foot and the line will then also fit the pattern pieces or you stitch two guide lines and ruffle by hand.

    Here is also a video on how to crimp crinkles.

    Here you can see a detail photo of the crimp.

    You also crimp the bottom part all around.

    Then stitch the top part right sides together with the bottom part and serge the seam allowances together.

    Iron the waistband left to left in the fold.

    Topstitch the waistband on the narrow sides, right sides together. Note to leave an opening in the inside waistband for the elastic tape . Press the seam allowances apart.

    The waistband has a so-called piping at the top fold. Topstitch a seam the width of a foot all the way around. (To secure the two layers of fabric, you can also sew an auxiliary seam topstitch foot width at the bottom edge).

    Now join the waistband right sides together with the upper part and serge the seam allowances together. Press the seam allowances down.

    Cut the elastic tape to your correct size and pull it through the opening in the inside waistband with a safety pin.

    Close the elastic tape to the round.

    Finally, topstitch the already ironed hem close to the edge all around.

    Your ROOS is ready!

    If you get stuck, or if you have any questions, feel free to contact us by email at info@schnittmuster-berlin.de.

    We will answer you as soon as possible.

    Have lots of fun with your new designer piece!

    Sincerely yours Schnittmuster-Berlin Team.

    PINTEREST PHOTO

    Zurück zum Blog